Lab: Disabling a Workflow
Introduction
In this lab, you will learn how to disable a workflow in a GitHub repository. This is useful when you want to temporarily stop a workflow from running without deleting the workflow file.
Estimated Duration: 10-15 minutes
Instructions
Step 1: Navigate to Your GitHub Repository
-
Open your browser and go to your GitHub repository where the workflow is located.

Step 2: Access the Actions Tab
-
Once in your repository, click on the Actions tab at the top of the page.
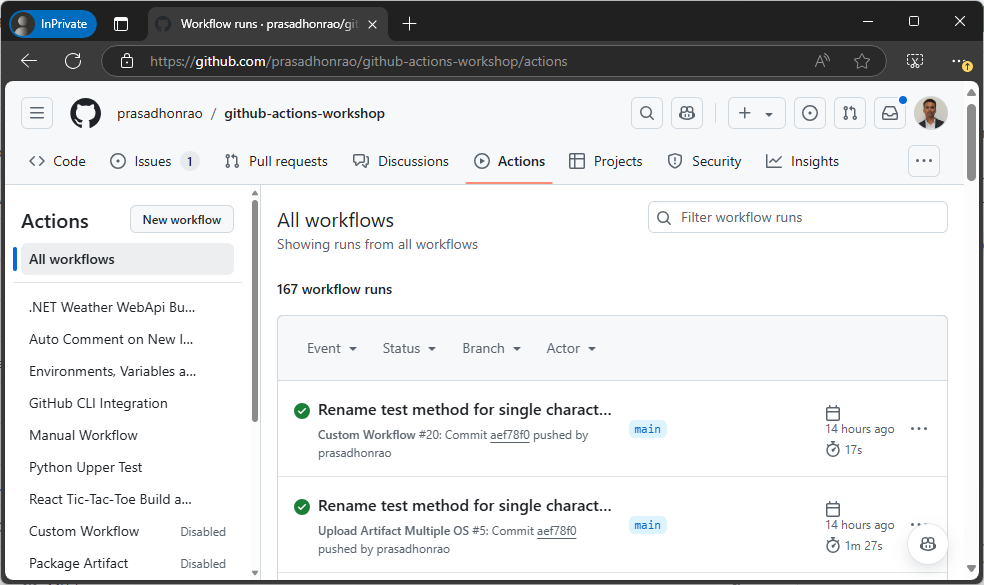
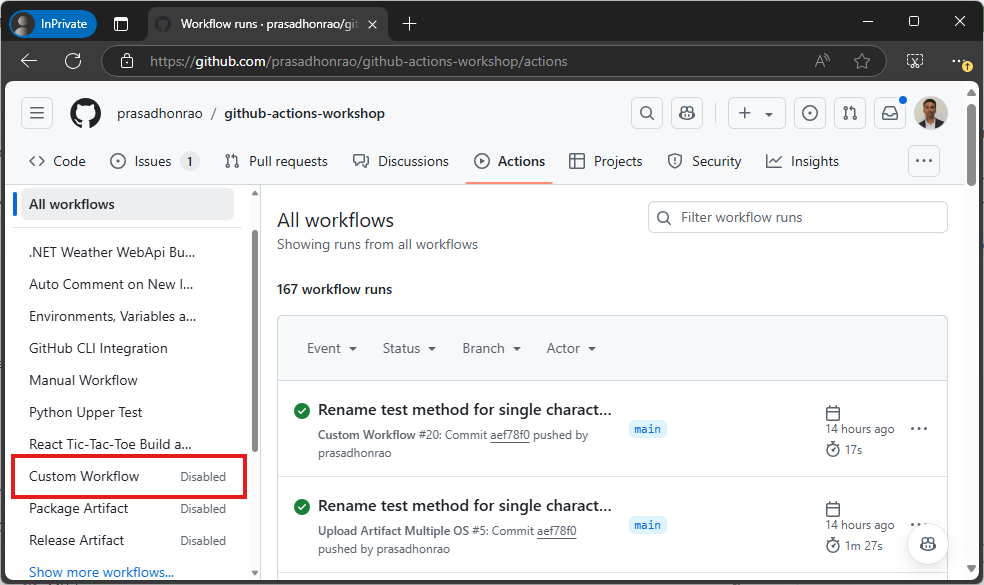
Step 3: Select the Workflow You Want to Disable
- In the Actions tab, you will see a list of workflows that have run in your repository.
-
Click on the workflow you want to disable.
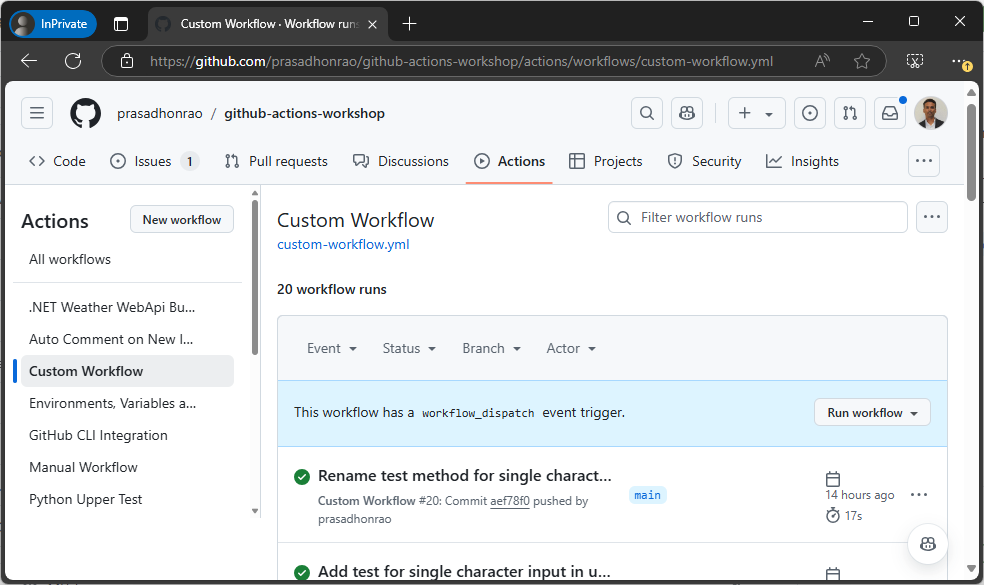
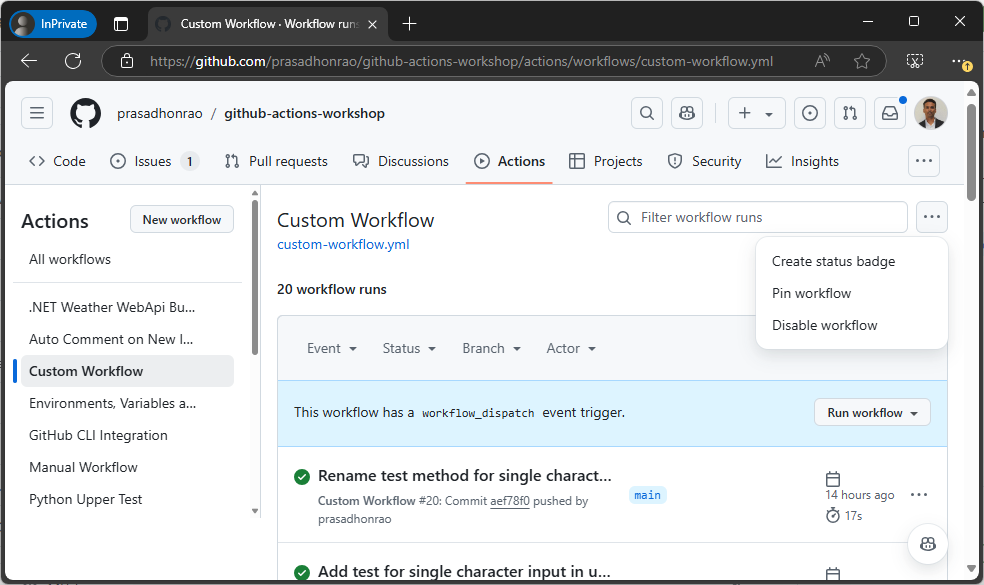
Step 4: Disable the Workflow
- After selecting the workflow, click on the Ellipsis (three-dot) icon on the right-hand side of the page.
-
From the dropdown menu, click on Disable workflow.
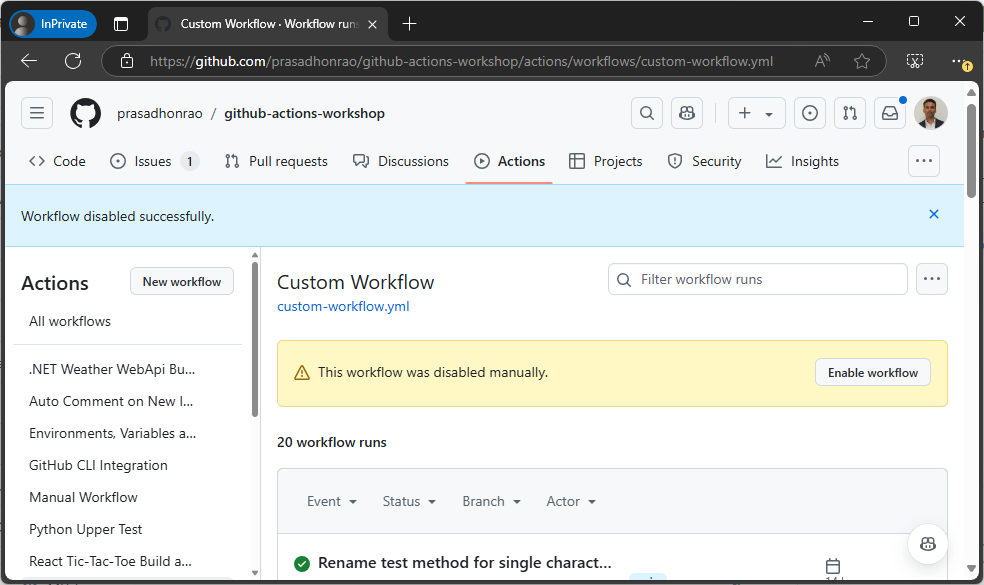
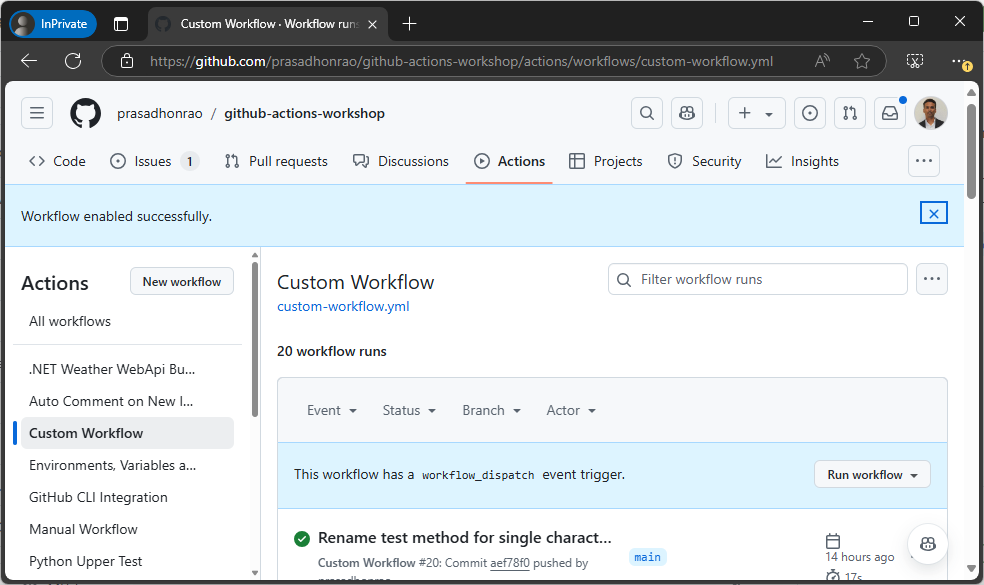
Step 5: Confirm the Workflow is Disabled
-
Once the workflow is disabled, you will see a confirmation message indicating that the workflow has been disabled.
Step 6: Verify That the Workflow Will Not Run Automatically
- After disabling the workflow, it will not trigger automatically when the specified events occur.
-
To confirm, try pushing a change or triggering the event the workflow was tied to. You should see that the workflow does not run.
Step 7: Re-enable the Workflow (Optional)
- If you want to re-enable the workflow, click on the workflow name in the Actions tab.
-
Then, click on the Enable workflow button.
-
You will see a confirmation message indicating that the workflow is now enabled and will run again when the specified events occur.
Summary
In this lab, you learned how to disable a workflow in a GitHub repository. This is useful when you want to temporarily stop a workflow from running without deleting the workflow file. You also learned how to re-enable the workflow when needed.