GitHub Actions Workshop
Master GitHub Actions with hands-on labs and exercises. Learn how to automate workflows, run tests, deploy applications, and more using GitHub's powerful automation platform. This repository has everything you need to get started with continuous integration and continuous deployment.
Project maintained by prasadhonrao Hosted on GitHub Pages — Theme by mattgraham
Lab: Create an ASP.NET Core Web API Project
Introduction
In this section, you will create a new ASP.NET Core Web API project using Visual Studio.
Duration: 10-20 minutes
Instructions
Step 1: Launch Visual Studio and Start a New Project
- Open Visual Studio on your computer.
-
On the welcome screen, click Create a new project.

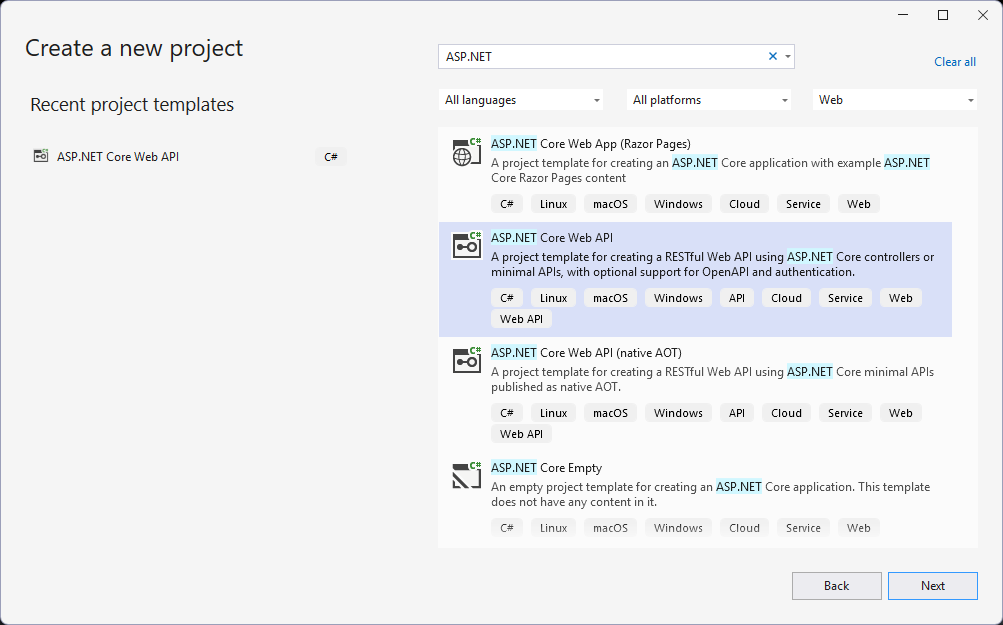
Step 2: Select the ASP.NET Core Web API Template
- In the Create a new project window, search for
ASP.NETin the template search box. - Select the ASP.NET Core Web API template from the results.
-
Click Next to proceed.
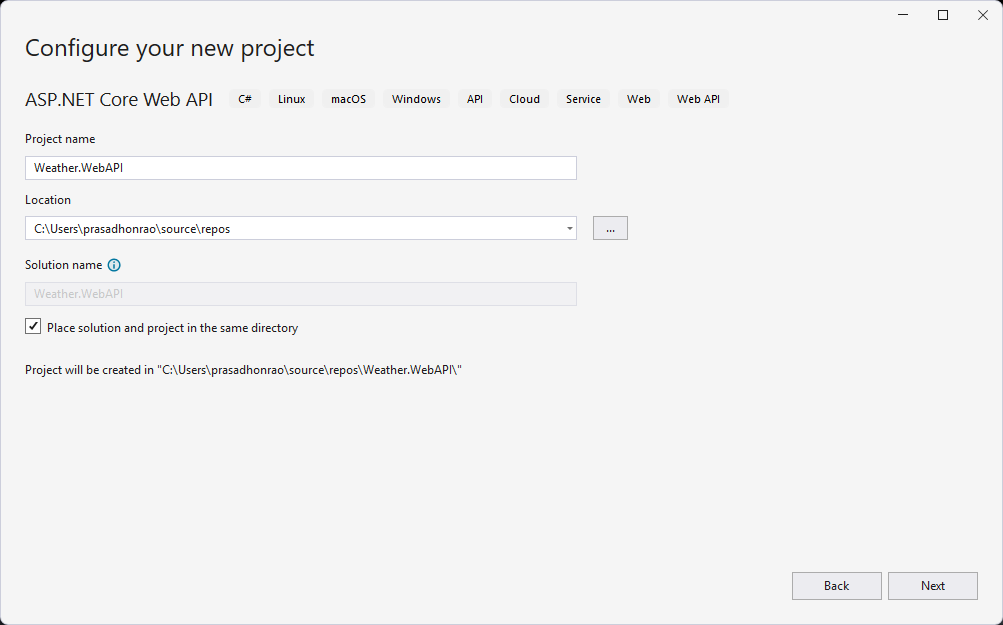
Step 3: Configure the Project Name and Location
- Enter the Project Name as
Weather.WebAPI. - Select a suitable location for your project files using the Location field.
-
Click Next.
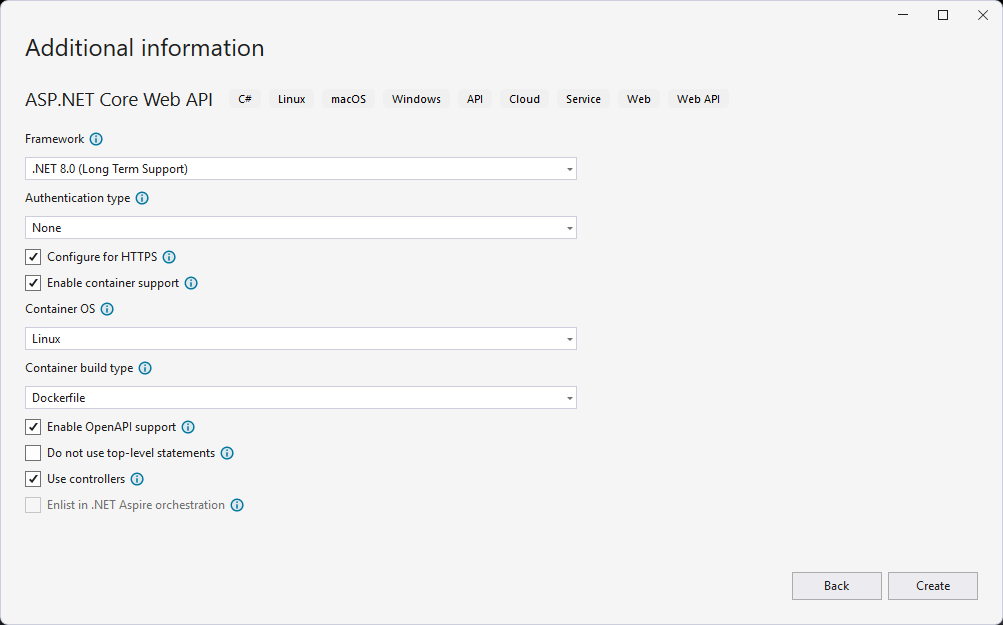
Step 4: Configure Project Settings
- In the Additional Information screen:
- Ensure the target framework is set to
.NET 8 (Long-term support)or the latest version. - Confirm the Authentication Type is set to None.
- Uncheck Enable Docker Support (unless you need it).
- Ensure the target framework is set to
-
Click Create to finalize the project configuration.
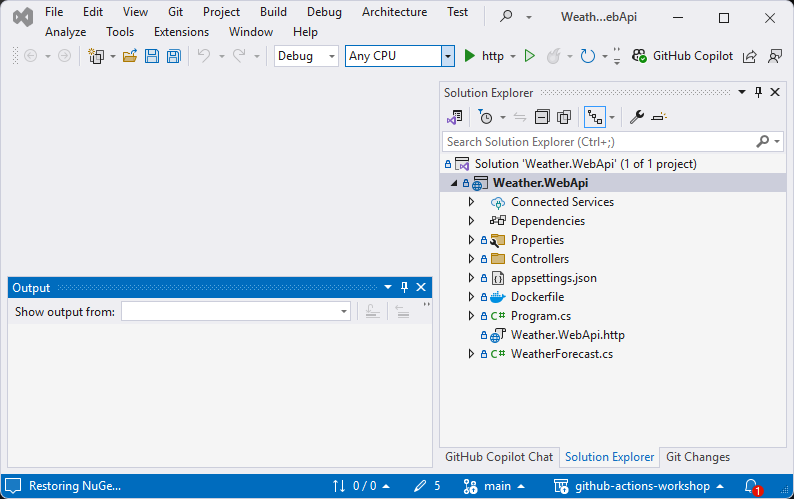
Step 5: Explore the Created Project
- Once the project is created, the solution will open in Visual Studio.
-
The project structure, including controllers and program files, will be visible in the Solution Explorer.
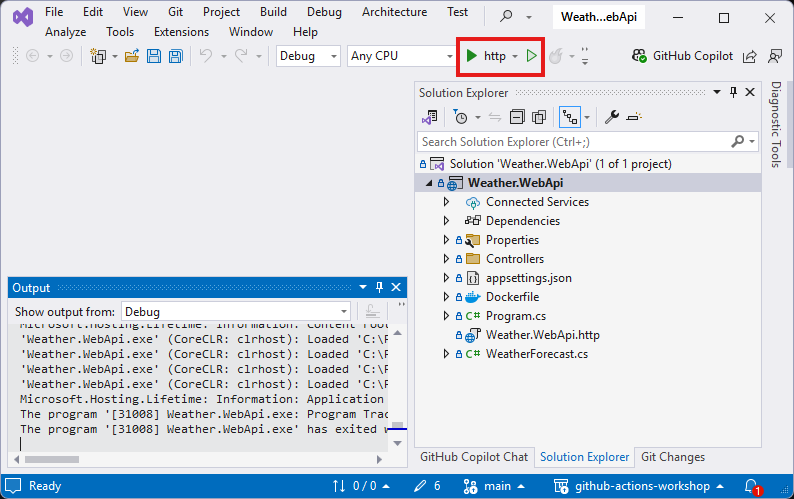
Step 6: Run the Web API
- Locate and click the Run button in Visual Studio (it will display an
httporhttpsURL). -
The project will compile, and the API will launch in your default web browser.
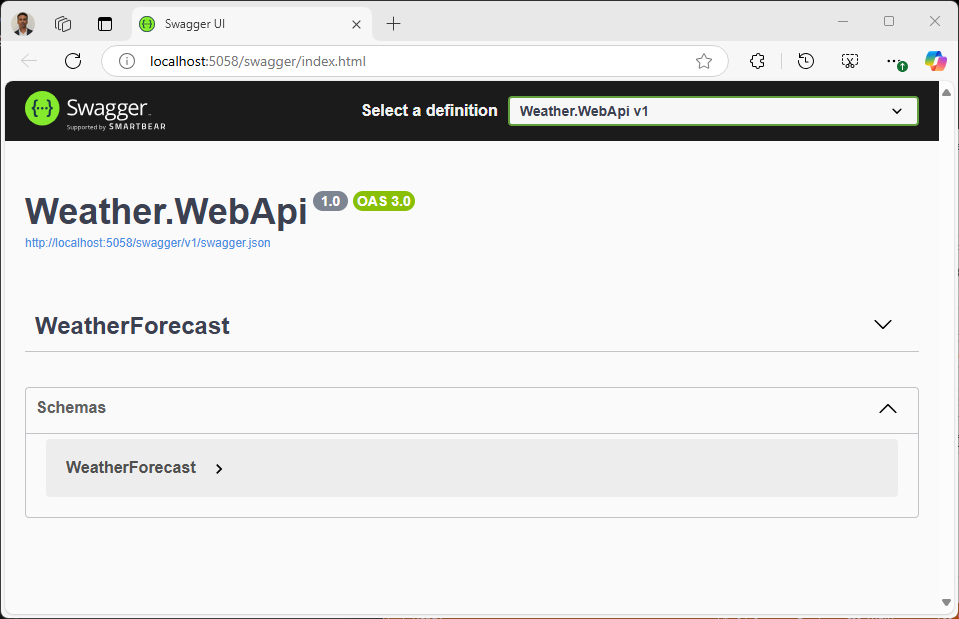
Step 7: Verify the API in the Browser
- When the browser opens, the API’s default Swagger documentation interface will be displayed.
-
Swagger provides an interactive UI to test your API endpoints.
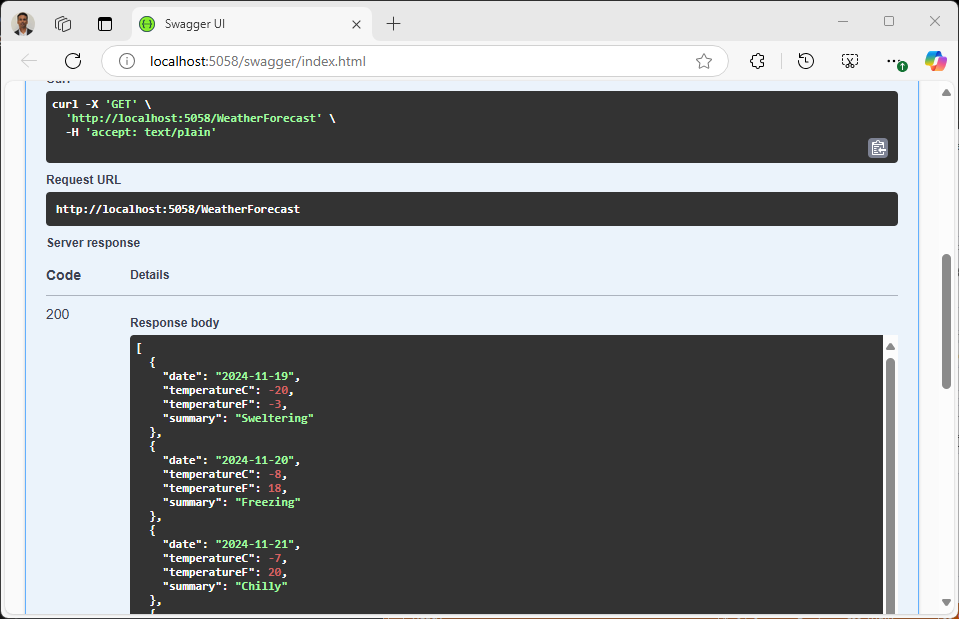
Step 8: Test the Weather API Endpoint
- Use the Swagger UI to test the API. Expand the WeatherForecast endpoint.
- Click the Try it out button, followed by Execute to send a test request.
-
Verify the API’s response in the Response Body section.
Summary
You have successfully created an ASP.NET Core Web API project, launched it in the browser, and tested it using Swagger UI. The Weather API is now ready for further development and integration.